Read full and detailed walkthrough for Endzone: A World Apart
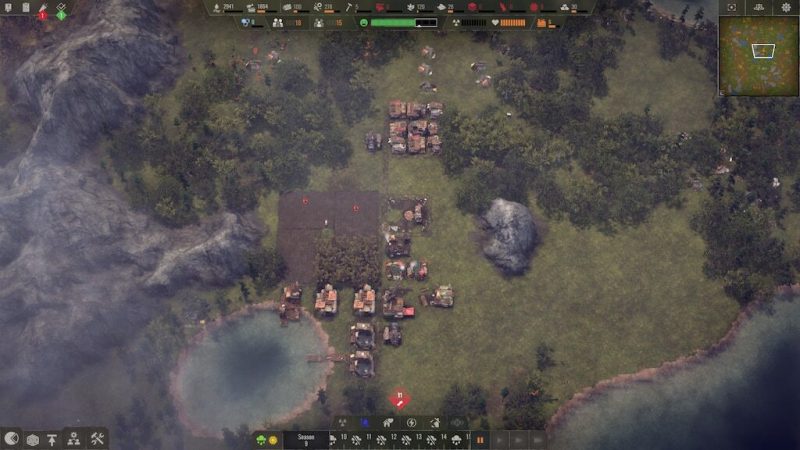
Phase 1 – Breaking Ground – Seasons 1 – 6
Description
- Getting off to a start, some basic needs including food, water and housing for population growth.
- Pause the game to take stock.
- Note: Sadly you will need to manually pause the game whenever loading a previous game and starting a new game.
- Set your limits.
- Note: This will help with freeing up workers to complete tasks or simply move things around as needed throughout the game.
- Place ‘Gather All Resources’ task. (And the scrap task if you want… Which is needed at the beginning of the game)
- Make 3 of your workforce Builders. (This will change as you build)
- Setting up your Mounted Bus.
- Note:
- Repair Buildings.
- Build Buildings.
- Building Roads.
- Change these around as needed but always return to these as your default settings. Click and hold then drag to the desired position.
- Pause all buildings as you place them.
- Place 6 cabins. (To begin population growth.)
- Place Well. (1 worker)
- Note: Place these near your housing so your settlers do not have to travel far.. will help to avoid thirst death spirals.
- Note: (This is better than the hunting lodge when starting) Use the Fishing hut to measure the distance between Jetty’s. They have a Proximity debuff if placed to close together.
- Place Jetty.
- Note: You only need 1 jetty for up to 4 Cisterns/Water Towers assuming you decide to keep them close… Just remember. Place your Cisterns / Water Towers close by your jetty’s to reduce travel time!
- Place 2 Cisterns. (2 workers)
- Note: Ensure to turn off gathering water from everything except the lake, we want the water collectors to use the lake only.
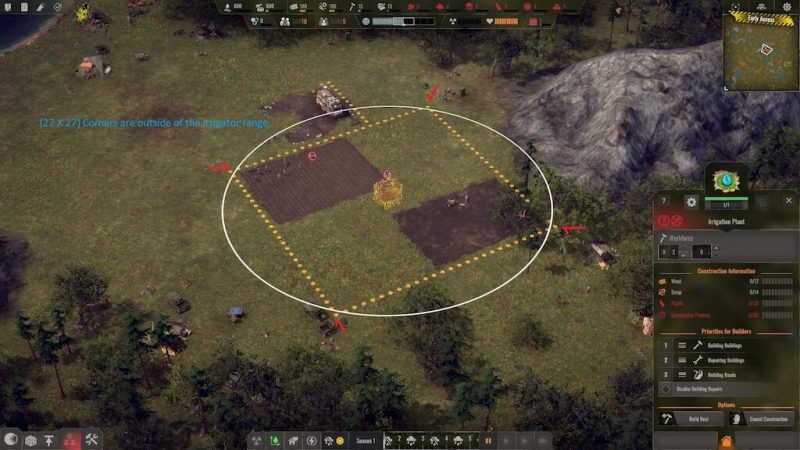
- Place 1 11×14 Orchid. (1 worker)
- Note: I tend to start with 1 Orchid, then then 3 cultivation farms in the below config best described by Noobi.. field dimension are in the comments of the screenshot.
- Upgrade Mounted bus.
- Note: Only upgrade once or you will end up getting tasks to increase your population by 15+ once connected to power.. very bad early on!! Do not change the storage options within this building yet!!
- Place 1 Temporary Storeroom. (near your fishing hut)
- Note: You can select what every storeroom can hold. In this case we only want to store food. Uncheck Raw Materials, Radiation Protection, Tools and Medication
- UNPAUSE THE GAME.. then Unpause 2 buildings at a time starting with your well and fishing hut.. then 2 cabins.. jetty + 1 cistern.. 2x cabins.. 2nd cistern.. 2x cabins and finally your Temp Storage.
- Note When buildings complete.. build roads then place all builders as settlers to gather as many resources until season 5.
Save Game!
Season 6 Phase 2 – Getting Resources – Seasons 6 – 10
Description
- Getting resources set up. You cant build anything without wood and scrap. Adding some extra storage whilst also expanding water gathering whilst preparing for more population.
- Note: Remember to change your workers so that at least you have 1x Settler & 1x builder. More is better!! 🙂
- Note: From this point on you can either pause the game and place your buildings then unpause them 2 buildings at a time.. be aware.. the game reserves resources when doing this.. or you can build as you place a building.. either way is fine.
- Place Scrapyard. (2 workers)
- Place Forester’s Lodge. (2 workers)
- Note: Change work order to cut only to clear around the Town Center, then change back to cut and replant once completed and moving the work area to a location close by but out of the way.
- Place 1 or open another farm as per the foundation farm setup above. (1 worker)
- Place 1 Well. (2 total}
- Place Charcoal Kiln. (1-2 workers)
- Place 2x Recylers. (2 workers – both cloth}
- Place 1 Temporary Storeroom. (2 total}
- Note: Set this one to only accept wood and scrap. Now UNCHECK wood and scrap in the Mounted Bus.
- Place 3 Cabins. (9 total)
- Note: Keep checking your task to ensure your settlers will keep working. And start to build roads if you haven’t already, then place all builders as settlers to gather as many resources until season 9.
- Save Game!
- Season 10
Phase 3 – Radiation Protection – Seasons 10 – 15
Description
- Setting up Cloth for Protective gear for your colony. Getting basic medical needs working whilst expanding for more food for the increasing population.
- Place 1 Tailor Once Cloth is available. (2 workers when able)
- Note: Only make Scarves to 50 then masks once your charcoal Kiln is built. Try to keep 30 Neck Scarves for future tasks. Change Recyclers to 1x cloth, 1x metal.
- Place 1 Workshop. (1 worker)
- Note: Metal tools only. You can make 20 scrap tools, you will need them for the Expeditions or tasks later on.
- Place 1 Well. (1 worker – 3 total)
- Place 2 Recyclers. (1 worker each – 2x Cloth, 1xPlastic, 1x Metal)
- Note: If you need to, take one worker from fisher. Just remember to replace.
- Place 1 Cemetery. (1 worker)
- Place 1 School. (1 worker)
- Note: Set this to either ‘Handling Tools’ or ‘Handling Clothing’ until reaching your first limits and then changing them over. (you will only have to do this until you research the ‘Advanced School’.)
- Place 1 Herbal Hut.(1 worker)
- Note: Change area of work to the same as the forester. Increase limit to 1000 then as needed.
- Place ‘Gather Plants’ task.
- Note: In the same area as your Forester / Herbalist Hut.. you can place this and forget it.. Gathers both Herbs and Food that are plants & is a requirement for the ‘An Unexpected Opportunity’ side mission.
- Note 2: In this same area.. place an irrigation pump when able too.. this will keep things growing through the drought when supplied with water.
- Place 1 Gatherer’s Hut. (1 worker)
- Note: Change area of work to the same as the forester. Increase limit to 1000 then as needed.
- Place 1 Shelter.
- Place 3 Cabins. (12 total)
- Place 1 Well. (1 worker – 3 total)
- Note: This one I tend to place in the middle of my longest walkway where water is not present.. With recent changes to the AI regarding settlers no longer needing to return home to drink.. I’ve started placing more wells near my industrial areas more and more to decrease travel times.
- Save Game!
- Season 15
- Note: If you run out of protective clothing.. you will get a task to make X No. of masks. You will be able to do this after building the Charcoal Kiln.
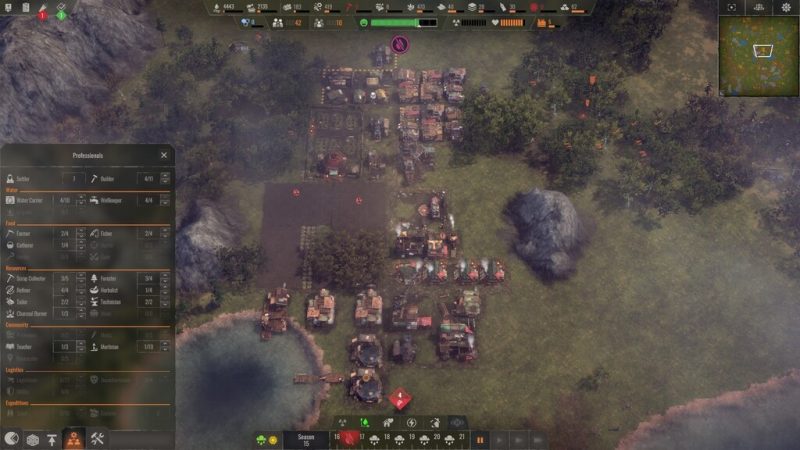
Phase 4 – Community Buildings – Seasons 15 – 20
Description
- Expanding food and adding some community buildings.
- Note: Monitor your people, ensure you have at least 1 Settler and 1 Builder.
- Place 2 or open another 2 farms & 1x Irrigation Pump as per the foundation farm setup above.
- (2 workers – 1 worker each)
- Place 1 Decontamination Post!
- Note: Place these to cover your storage buildings. TIP: if you get a side quest that you can not interact with called ‘Vermin’ that takes a portion of your food.. i’ve been able to narrow the reasons for this down to not having enough Decontamination Posts covering your storehouses.. So check your Decontamination posts coverage when this happens to make sure or find the storage that is not covered and ensure that storage is covered for the future.
- Place 2 Recyclers. (1 worker each – 6 total)
- Note: 1x plastic, 3x cloth, 2x metal.
- Place 1 Temporary Storeroom. (Food only – uncheck all others.. place this near your farms.)
- Place 1 Food Station. (1 worker)
- Note: Move the work area range to include your food storage buildings.
- Place 1 Forum.
- Note: Check this often for side tasks. ‘Field Testings’, ‘First Settlers’, ‘Knowledge is Power’ and ‘An Unsuspecting Opportunity’ to get research points and seeds.
- Place 2 Cabins. (14 total)
- Place 1 Medical Facility.
- Note: This will make medicine from herbs.. later these can make Iodine Tablets once you research Iodine Mines..
- Upgrade 1 Cistern to Water Tower and turn on charcoal filtration.
Season 20 — Appoprox 60 poplation
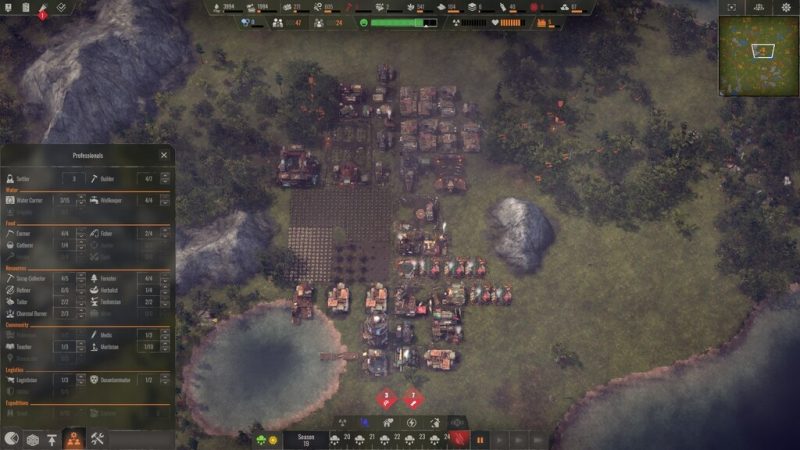
Phase 5 – Expeditions / Research – Seasons 20 – 30
Description
Setting up Expeditions / Research and Livestock
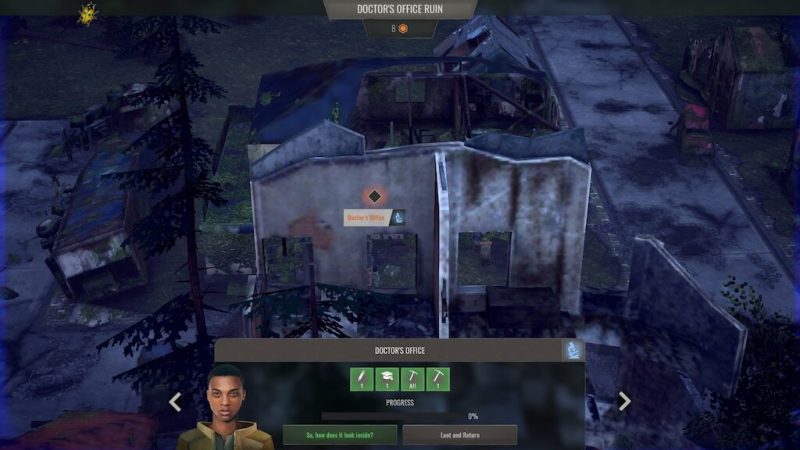
Place Expedition Station.(2-5 Scouts)
Note: Send your scouts out to scout & unlock ruins to be explored for ‘Utensils’. These are used to unlock all tiers of research once discovered. You will need to actually start exploring the ruin AFTER scouting to find the Utensils. Fully explore a ruin offering utensils to be credited with it. (Greenhouses can provide new seeds)
Note2:
– White ? icon = needs to be scouted.
– Green ? Icon = Already scouted and needs to be explored.
– The green icon also means it may not have been fully explored yet or you have not collected all the loot. You must fully loot (using the ‘Loot & Return’ button) a ruin for the green icon to disappear.
– You must then select the ruin to be ‘Marked for Salvage’ to be able to salvage scrap from that ruin.
– Some ruins are repeatably able to be explored and looted over time. eg: Hospitals
What to look for: (Tip: The Diner more often than not has a Utensil.)
Place 1 Pub. (1 worker)
Place 1 Hunter. (1 worker)
Note: Set this to ‘Hunting & Capturing’.. You will only be able to capture 2 types of animals for the pastures.. this is random with each game start. You will need to trade for the rest once your Trading Post is built.. then you’ll need to make ‘Good Deals’ (green bar) for animals to be offered more often.
Place 1 Pasture. (1 worker)
Note: I waited until season 25 to use the Pasture as it constantly uses water and we needed to establish a water supply early.
Place 1 Tailor. (2 workers – 1x 50 Scarfs – 1x 100 Masks)
Place 1 Workshop. (2 workers – 1x 50 Scrap Tools – 1x 100 Metal Tools)
Upgrade 2nd Cistern.
Note: Add another water tower when both Water towers are full then add one as each fills.
Place 2 Cabins.(16 total)
Place 1 Well.(4 total)
Note: Place this one near your irrigation pump.
Place 1 Temporary Storeroom. (uncheck Food & Raw Materials)
Place 1 Shelter.
Place 1 Research Station. (2-5 workers)
Note: Research Electronics – Wind Turbine – Advanced School as your first 3 research jobs (all tier 0). – place your first Wind Turbine next to your Research Station to speed up research. Explore Ruins with you scouts from the Expedition Station to find utensils to unlock higher tiers of research.
Check and update Limits
Note: This is something you now need to do regularly. Increase food/water by 10,000 increments.. normal resources as described at the beginning of this walkthrough. Herbs, medicine and Expedition Rations all have side quests requiring you to increase the limits in order to complete them. Otherwise play it by ear as and when you need to increase the limits.. Failing to keep an eye on this WILL cause issues down the track..
Season 30

Phase 6 – Trading – Seasons 30 – 40
Description
Expanding food and adding some community buildings
Note: if your playing with Raiders turned on… When Raiders make contact at season 30, Pay the tribute to buy more time to discover Utensils to research Defence Measures… this should be researched after wind turbines — 3rd — It is very unlikely you will research the Raider defence buildings before the end of this walkthrough.. (They will attack every 15 seasons up to season 75 then it appears to be random intervals)
Place 1 Pasture. (1 worker)
Place 1 Tailor. (2 workers)
Note: 1x scarves, 2x Masks.
Place 1 Workstation. (2 workers)
Note: 1x scrap Tools, 2x Metal Tools.
Place 2 Recyclers. (1 worker each – 8 total)
Note: 1x plastic, 4x cloth, 3x metal.
Place 1 Shelter.
Place 1 Forester. (2 workers)]
Note: Place the working range over the same area as the first Forester.
Place 1 Well. (5 total)
Note: Place this one near your Decontamination Post or Pasture.
Place 1 Water Tower. (2 workers)
Place 1 Decontamination Post. (1 worker)
Place 1 Market. (1-2 workers)
Note: Place this in the direction of where you plan to expand your settlement.
Place 1 Trading Post. (2 workers)
Note: This is super important to get within the first 50 seasons.. it allows you to trade in items you might be lacking.. I tend to prioritise protective gear, tools and most importantly Iodine Tablets.
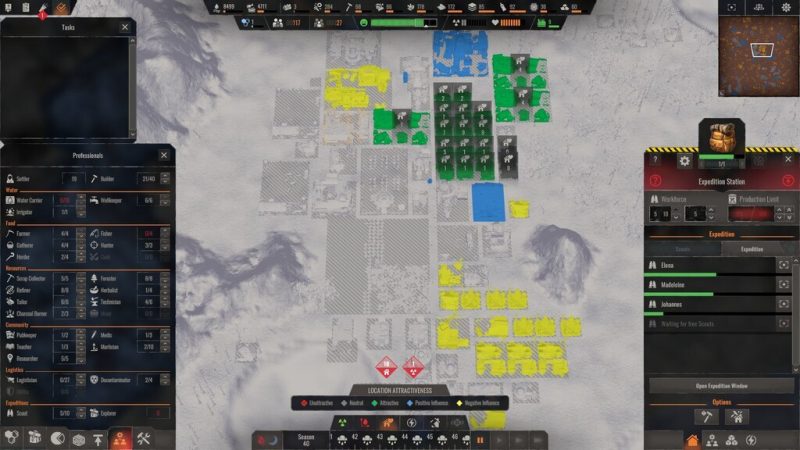
Note: Check the attractiveness of your settlement.. Place decorations near the buildings in red.. this will help to improve confidence.
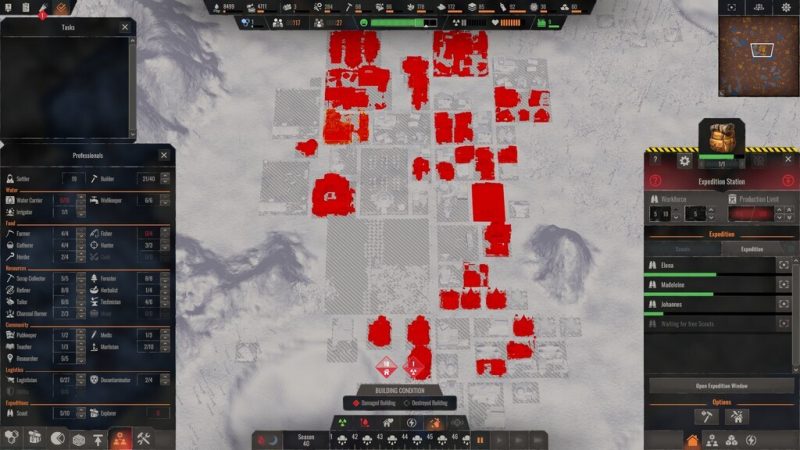
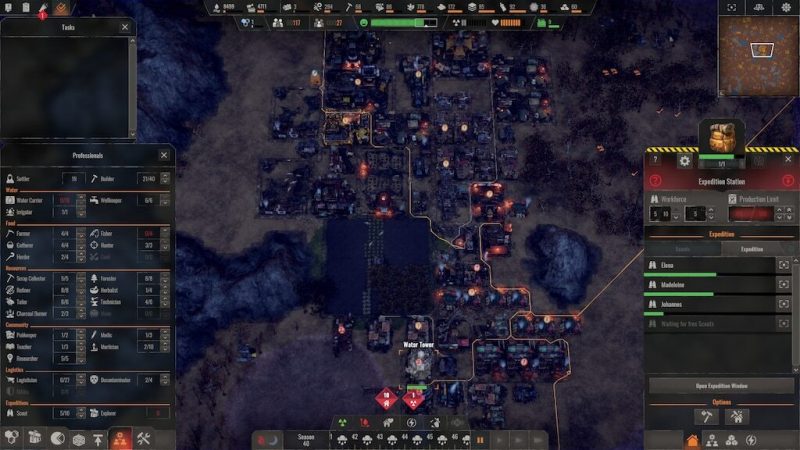
Note: You’ll notice I pulled my water carriers and fishing settlers to make them builders in order to repair the damage.. this is my standard play when this happens and should show you that every part of this game is about micromanaging.
Save Game!
Season 40 – Approx 100 population
Now your ready to move on to bigger and better things.
Remember …. When expanding use this simple rule… Food.. Water.. Protective Gear / Tools then Population.
Setting Limits
When to Increase limits.
Its’s virtually impossible to advise this. There are so many variables that affect this.. size of settlement, number of total settlers and what those settlers are in need of.. distance settlers have to travel etc.. and these are just a few issues..
Everybody has different views on this.
My normal limits increase as follows:
eg:
- Wood.. Scrap 1500 at a time.
- Food.. 10,000 at a time.
- Production items.. eg: Cloth, Metal, Plastic, Eelectronics 100 then increase by 50 at a time or as needed.
- Protective Clothing and Tools 50-100 at a time depending on number of newborns.
- Herbs.. Medication – 250 then as side missions need. Most others can fall into this category without listing them all.
- These numbers are just what I start off with below 300 settlers. Increasing upto 8000 settlers which are way more. and these limits should be checked every 25 seasons at least.
NEVER EVER set the limits to max as you might in other games.
If you do not keep an eye on your inventory and the needs of your settlement. Your settlement will end up in a death spiral not because of one thing, but because of multiple shortages. It’s kind of like a domino effect.
Research Tips
Research has changed slightly with the ‘Research Equipment Update’.
Research has been broken down into Levels (based on the number of Utensils located).
Note: I sometimes refer to them as either Levels or Tiers but officially in game they are refered to as Levels. 1 Level = 1 Utensil.
For this guide we will be only using the first tier (No Utensils needed for Level 0) and your Priorities are:
- Electronics (To build a wind Turbine)
- Wind Turbine (To power your Research Station thus speeding up Research)
- Defence Measure (for Defence Towers and Ammunition Buildings – 1 Utensil required if playing with Raiders turned on – Research sirens asap as I’ve had a lot of success with them.)
- Advanced School (To reduce the wear and tear on tools/protective equipment)
- Improved Radio Mast (To increase the different traders that visit your settlement.)
- Your next priorities after the tutorial will be scouting the ruins for Utensils to Unlock the next levels of Research (if you haven’t started already).
Your goal here is to get to the Scrap Catcher (3 Utensils needed).. continue scouting until you find your 3rd utensil to unlock this tier.
In the meantime research the following:
- Coal Mining (To save on wood)
- Solar Collector
- Battery (so your settlement will work through the night and Raider defence needs power)
- Warehouse (To increase the storage capacity of your storage)
- Sturdy House (To increase your population without expanding further early on.. SLOWLY)
Remember your goal is the scrap catcher (3 Utensils needed).. interrupt other researches once this becomes available..
Note: You want to place down 4 Scrap Catchers per Scrapyard.. myself I like 6 per Scrapyard.. then simply focus your Scrapyard’s work area over them.
Config: 1x Scrapyard, 4x Scrap Collectors, 1x Wind Turbine to power the Scrapyard and 2x storage buildings set to accept scrap only.. build them as close together as possible.
Scatter this config around your colony for best results. I use 3x this config for a colony size of 4.5k+